Disclosure: This site may earn a commission if you buy through links on this page or elsewhere on the site. Always check the manufacturer instructions and current safety guidance before buying, building, modifying, or using bunk beds or loft beds.
A loft bed can make a dorm room feel more usable, but only if the layout works with the room, the furniture, and the school’s rules. The goal is not to fill every inch. It is to create clear zones for sleep, studying, storage, and everyday movement.
Before you rearrange anything, check your residence hall handbook for lofting rules, wall-attachment limits, fire safety requirements, and move-out expectations. Then measure the room, the ceiling height, the window placement, the outlet locations, and the swing of the door. Those details determine whether a loft bed will improve the room or make it harder to use.
Table of Contents
Quick Answer
The best dorm room ideas with loft beds use the space underneath for one primary function, such as a desk, dresser, or lounge seat, while keeping paths open, airflow clear, and the setup reversible for move-out.
| Decision | Practical guidance |
|---|---|
| Study zone under the bed | Place a desk, task lamp, and chair under the loft if the clearance allows comfortable sitting and screen height. |
| Storage zone under the bed | Use low, stackable bins, a small dresser, or lidded drawers so items stay accessible without blocking ventilation. |
| Lounge zone under the bed | Choose a compact chair, pouf, or cushion seating if the room still needs a place to relax besides the bed. |
| Privacy setup | Use curtains or fabric panels only if allowed by school policy and if they do not cover sprinklers, vents, or exits. |
| Safety check | Keep ladders stable, leave enough ceiling clearance, and avoid blocking windows, heaters, smoke detectors, or egress paths. |
Plan the room around one main purpose beneath the loft
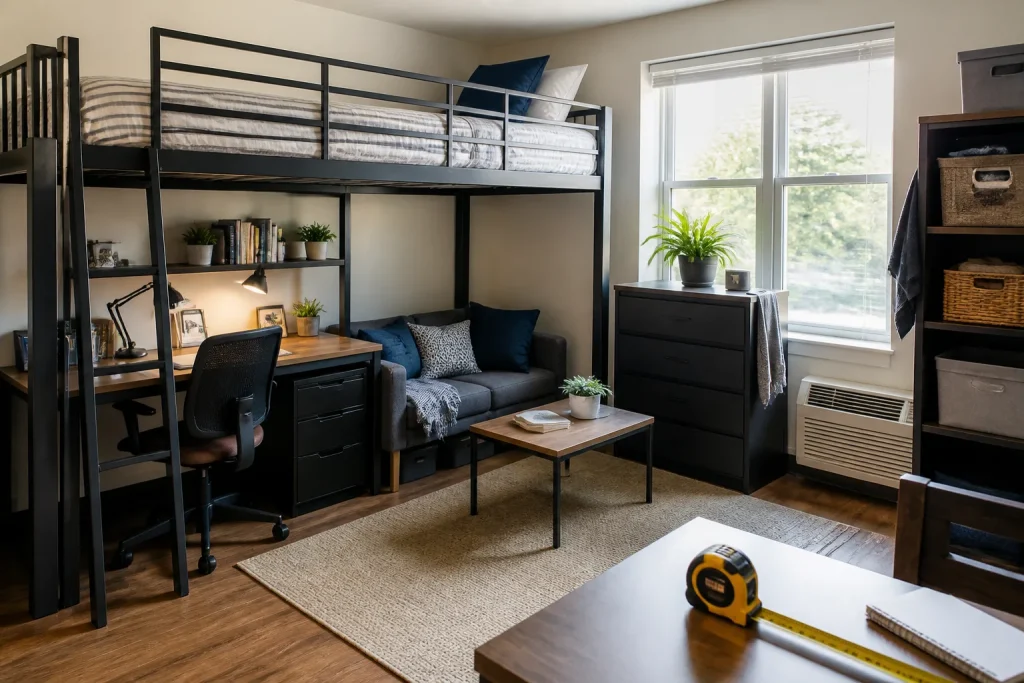
The easiest dorm layout is the one that gives the space under the loft one clear job. If you try to use it for everything, the room can start to feel crowded and hard to clean. Pick a primary use first: studying, storing clothing and school supplies, or making a small lounge area.
For most students, the best approach is to treat the loft as the sleeping zone and build the most time-sensitive function underneath it. A desk zone works well for students who spend long hours at a laptop. A storage zone works better in rooms with a separate common area or with very limited floor space. A lounge zone can make sense in larger rooms, but only when it does not interfere with everyday movement or shared access.
- Choose one primary function under the loft before adding accessories.
- Keep the floor area outside the loft zone open for walking and laundry.
- Use furniture with simple shapes so the layout is easy to rearrange later.
Study-first layouts
A study-first layout usually works best when the bed is lofted high enough to fit a chair, desk, and lamp beneath it. Measure from floor to the underside of the bed platform, then compare that number to the seated height of the chair and the desk surface. You need room not just to fit, but to sit comfortably for longer periods.
If the desk goes under the loft, keep cords organized and leave space for a backpack hook, file box, or small printer only if the school allows it and the desk still feels usable. Avoid placing the monitor or laptop too close to the mattress edge, where it can be bumped when climbing in or out.
Measure carefully before choosing a dorm loft setup
Dorm rooms vary a lot, even within the same residence hall. A loft bed that works in one room may be awkward in another because of a low ceiling, a window that sits too high, or a radiator that limits furniture placement. Start with three measurements: total ceiling height, floor-to-under-loft clearance, and usable wall length.
Also measure the door swing, closet depth, and the distance from the bed area to the door. You want a layout that lets both roommates move through the room without climbing over bags or furniture. In many dorms, the best setup is not the tallest possible loft. It is the one that leaves enough space for sitting upright, opening drawers, and reaching outlets without stretching across the bed.
- Ceiling height: confirm the loft leaves comfortable headroom and does not crowd sprinklers or fans.
- Floor clearance: check that the space beneath the bed matches the height of the chair or storage unit you plan to use.
- Wall length: make sure the desk or dresser fits without blocking vents, windows, or the door path.
- Outlet access: confirm you can plug in a lamp, charger, and laptop without running cords across a walkway.
- Move-out plan: choose a setup that can be disassembled or returned to the original bed height if required.
| Measurement | What to check |
|---|---|
| Ceiling height | Room to sit upright beneath the loft and enough distance above the mattress for safe bedding use. |
| Window height | The bed should not block the window, curtain operation, or emergency access. |
| Vent and radiator location | Leave air paths open so the room can heat, cool, and ventilate properly. |
| Door and closet clearance | Make sure the room can still function when the door opens and closet doors swing out. |
| Ladder access | The ladder should have a clear, stable approach with nothing stored at the base. |
Build a study zone that stays usable all semester
A good under-loft study zone should feel simple. The essentials are a desk, a chair, a task light, and a place for books or school supplies. If the desk is too deep or the chair too tall, the zone becomes uncomfortable quickly and stops getting used. Keep the setup modest and functional.
Choose lighting carefully. Dorm overhead lighting is often too harsh or too dim for long study sessions. A focused desk lamp can help, but it should not create glare on a laptop screen. If you use a monitor, position it so the top of the screen stays at a reasonable eye level when seated. Small storage trays, cable clips, and a pinboard can help without making the area feel cluttered.
What to keep within arm’s reach
Keep the most-used items close: chargers, notebooks, pens, headphones, and a water bottle. Less-used items can go in bins or on a shelf nearby. This reduces the amount of reaching and shifting you do in a tight space.
For a cleaner layout, use vertical storage on the wall only if the school allows it and if you can remove it later without damage. Adhesive organizers may be more practical than nails or screws in a dorm setting, but always check surface rules first.
Use storage that fits the dorm reality
Storage under a loft bed should be easy to access and simple to move. Tall dressers can work only if the bed is lofted high enough and the drawer clearance is still comfortable. In many dorms, low storage pieces are more reliable because they fit under the bed without making the area feel cramped.
Good options include rolling bins, stackable crates, underbed drawers, shoe organizers, and lidded boxes. Group items by category: linens, toiletries, school supplies, snacks, and off-season clothing. That way, you do not need to empty half the room to find one item. If the bed is a temporary loft, consider storage that can later be used beside or inside a closet after move-out.
- Use labeled bins so you can find items quickly in a small room.
- Keep frequently used items toward the front, not buried in the back.
- Choose storage that slides out without scraping the floor.
- Avoid overfilling bins, which makes them hard to lift and rearrange.
| Storage choice | Best use |
|---|---|
| Rolling bin | Seasonal clothing, linens, or bulkier supplies |
| Low dresser | Folded clothing and daily essentials |
| Lidded cube | School supplies, snacks, or electronics accessories |
| Shoe rack | Shoes, slippers, and laundry items |
| Hanging organizer | Small toiletries, cords, or accessories |
Create a small lounge zone without crowding the room
If your dorm has enough square footage, the space under a loft can become a small lounge area. This works best when the room already has a separate place for studying or when both roommates want a clear non-sleeping area. A compact chair, floor cushion, or small ottoman can make the room feel less like a narrow sleeping area and more like a shared space.
Keep the lounge simple. One seat, one small side table, and a reading lamp are often enough. Anything larger can block the path to the closet or door. If you use curtains for privacy, make sure they can be pulled aside easily and do not interfere with lighting, ventilation, or emergency access.
- Pick seating that is light enough to move during cleaning or roommate changes.
- Use soft storage, such as baskets, for blankets or game supplies.
- Leave a clear floor path from the door to the closet and window.
- Avoid bulky sofas or oversized beanbags unless the room is unusually large.
When a lounge zone makes sense
A lounge zone is most practical in larger dorm rooms, suite-style spaces, or rooms where the under-bed area is not needed for a desk. It can also work for students who prefer to keep schoolwork elsewhere and want one corner of the room for reading or short breaks.
If you share the room, agree in advance on what the lounge is for. Shared seating can quickly turn into storage unless both people understand how the space is supposed to work.
Respect safety, egress, airflow, and school rules
Dorm loft ideas need to work within safety limits. The room should still support normal movement, fresh air circulation, and fast exit if needed. Do not block the doorway, windows, vents, or smoke detectors. Keep the ladder clear. If the loft leaves so little room that you cannot sit, stand, or move safely, the setup is too tight.
Many schools also have rules about what can be attached to walls or ceilings, what can be placed near sprinklers, and whether lofting must be reversible. Do not assume a room allows permanent modifications. Use the residence hall handbook and housing staff guidance before adding rails, curtains, lights, or hanging storage. If you are unsure whether something is allowed, choose the simpler option.
- Keep egress paths open from the bed to the door.
- Leave ventilation unobstructed so air can move through the room.
- Use only approved methods for attaching organizers or decorations.
- Check that the ladder does not wobble and that the bed frame is positioned on a level surface.
- Avoid placing items where they could fall onto the sleeper or block access in an emergency.
| Safety topic | Practical rule |
|---|---|
| Egress | Do not block the door, window, or main walking path. |
| Ventilation | Leave vents, radiators, and fans unobstructed. |
| Sprinklers | Keep clear space around sprinkler heads and ceiling hardware. |
| Ladder stability | Make sure the ladder is secure and easy to use every day. |
| Reversibility | Use setups that can be removed without major wall or furniture damage. |
Make the setup reversible for move-out day
Dorm furniture often needs to be returned to its original condition, and the best loft bed ideas account for that from the start. Reversible setups save time and reduce stress at the end of the term. They also make it easier to change room layouts if the school moves beds or if a roommate arrangement changes.
Choose storage, lighting, and privacy pieces that can be packed quickly. Avoid built-in modifications unless the housing office specifically allows them. If you are using curtains, adhesive hooks, shelf liners, or cable clips, test whether they remove cleanly before relying on them for the whole semester. Keep the original bed parts, hardware, and instructions together in one labeled bag.
- Store extra hardware in a labeled bag near the bed frame.
- Use removable organizers when possible.
- Take photos of the original setup before changing it.
- Keep a short move-out checklist so the room can be restored quickly.
Good reversible upgrades
A reversible dorm loft setup usually includes items that can serve multiple uses after the semester ends. Rolling storage, desk lamps, stackable bins, clip-on lights, and compact seating all fit that goal. If your room changes, these items can be repurposed in another apartment, bedroom, or storage closet.
For bed access, it can also help to review ladder options before settling on the layout. If you want a practical comparison, see the internal guide on dorm loft bed ladders: https://lshapedbunkbed.com/scaling-new-heights-the-ultimate-guide-to-choosing-the-perfect-ladder-for-your-dorm-loft-bed/
Related Guides
Keep planning with loft beds for 8-foot ceilings, dorm loft bed ladders, L-shaped bed guide.
FAQ
What is the best use of space under a dorm loft bed?
The best use is usually one primary function: study, storage, or lounge. The most practical choice depends on room size, ceiling height, and whether you need a desk in the room.
How much clearance do I need under a loft bed in a dorm?
You need enough clearance for the furniture, the user, and comfortable movement. Measure the bed height, chair height, and desk height together, not separately, before choosing a setup.
Can I block the window with a loft bed?
No. Avoid blocking windows, vents, heaters, or any required exit path. The bed should not interfere with airflow or emergency access.
Are curtains under a loft bed allowed in dorms?
Sometimes, but it depends on the school’s rules. Curtains should not cover sprinklers, block vents, or create a hazard, and they should be easy to remove at move-out.
What should I pack for a lofted dorm bed setup?
Common basics include a secure ladder, a low-profile desk or storage unit, a task lamp, bins, extension-cord management approved by the school, and simple bedding that is easy to make and remove.